To kick off my blog, I want to share something I've learned from a recent side-project, Leinwald. German for "Canvas", Leinwald is a next generation infinite canvas app, utilizing the latest in web technologies. It's a work in progress, but I'm excited to share what I've learned so far.
The first thing I want to talk about is panning and zooming. This is a feature that's been around for a while, but it's still a bit tricky to implement. I'm going to show you how to do it from scratch, with no dependencies, just the way we like it.
Before we jump in, I want to give you an overview of how panning and zooming works at a high-level. This foundational knowledge will help you understand the code that follows.
Under the hood
At a high level, zooming and panning is just a matter of transformation. We can think of what we see on our computer screen as a viewport into a larger space. When we zoom in, we see less of the larger space, and when we zoom out, we see more of it. Likewise, when we pan, we're moving our viewport around the larger space.
In order to implement this, we will need to keep track of a couple pieces of information, which will make up our viewportTransform:
- The scale of our viewport (
scale) - The position of our viewport (
xandy)
Important note: We will be using the terms
scaleandzoominterchangeably. They mean the same thing.
Setup
Before we can get hacking, let's first create a simple HTML page. Feel free to integrate this in any framework you'd like, but to keep this tutorial simple, we'll just be looking at a single HTML file. Converting this to a React component is left as an exercise for the reader.
<html>
  <body>
    <canvas width="500" height="500" id="canvas"></canvas>

    <script>
      const canvas = document.getElementById('canvas')
      const ctx = canvas.getContext('2d')

      const viewportTransform = {
        x: 0,
        y: 0,
        scale: 1
      }

      // From here on, everything we'll write will go below 👇
    </script>
  </body>
</html>
If you're familiar with HTML Canvas, then you'll recognize the canvas element. If you're not, don't worry, we'll be using it to draw some shapes onto the context. We'll also be using a viewportTransform object to keep track of our panning and zooming.
Next up, we need a way to draw our shapes. For the purpose of this example, we'll stick to drawing rectangles. However, everything that we're writing here can be applied to any shape, or event images.
const drawRect = (x, y, width, height, color) => {
ctx.fillStyle = color
ctx.fillRect(x, y, width, height)
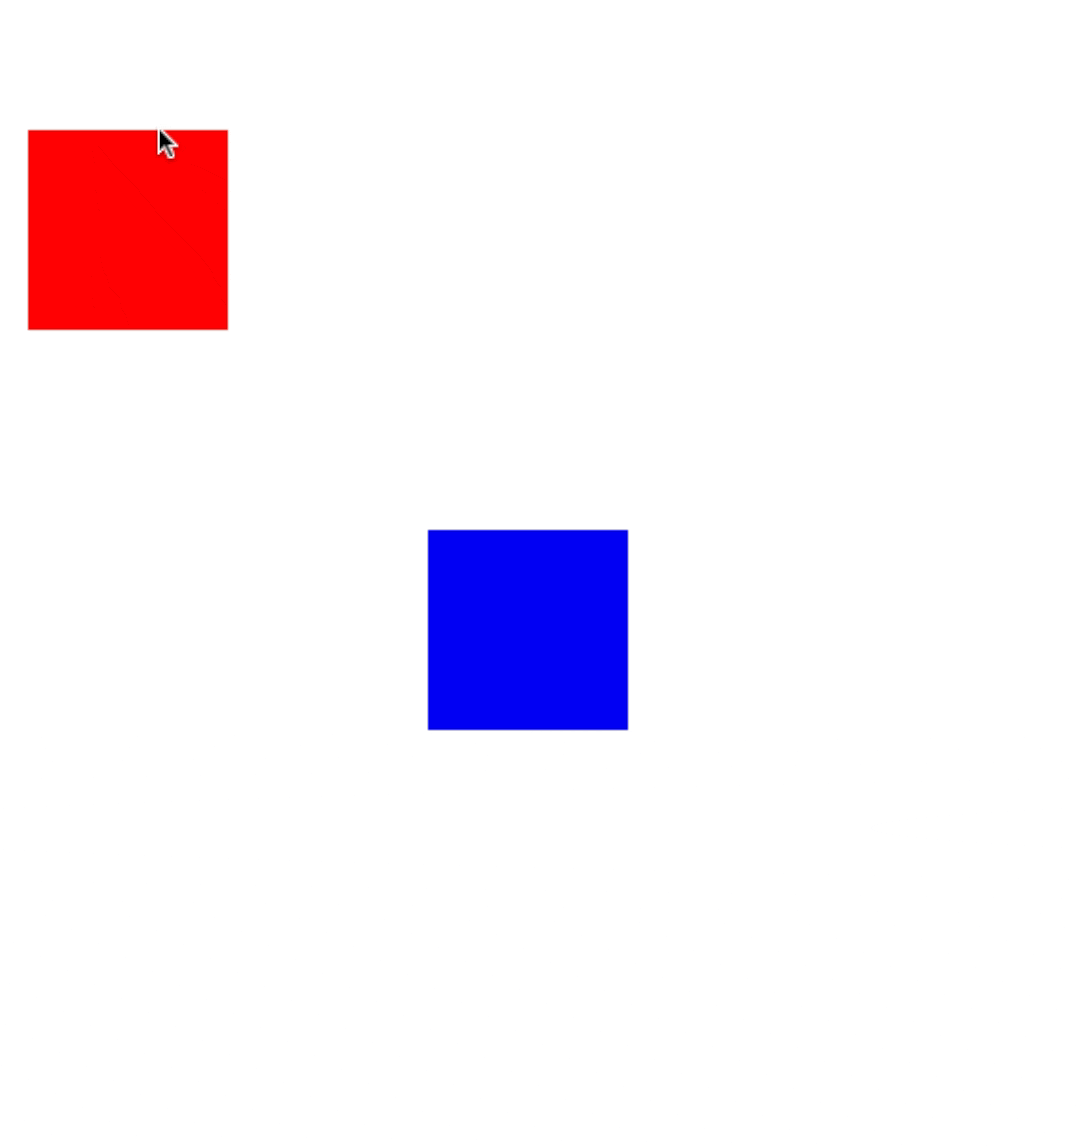
}Now that we have a way to draw rectangles, let's draw a simple scene to work with. We'll draw a red rectangle, and a blue rectangle. This will help us visualize how panning and zooming works.
const render = () => {
  drawRect(0, 0, 100, 100, 'red')
  drawRect(200, 200, 100, 100, 'blue')
}

render()
When we open our browser, we'll see the following image.

With that out of the way, let's get to the good stuff.
Panning
Panning is the act of moving our viewport around the larger space. In order to do this, we need to move our viewport by a certain amount. We can do this by simply adding the amount we want to move to our x and y values of our viewport transformation.
However, before we can do that, we'll also need a way to interact with our viewport. To do this, we'll add a few event listeners to our canvas element.
// We need to keep track of our previous mouse position for later
let previousX = 0,
  previousY = 0

const updatePanning = (e) => {
  const localX = e.clientX
  const localY = e.clientY

  viewportTransform.x += localX - previousX
  viewportTransform.y += localY - previousY

  previousX = localX
  previousY = localY
}

const onMouseMove = (e) => {
  render()

  console.log(e)
}

canvas.addEventListener('mousedown', (e) => {
  previousX = e.clientX
  previousY = e.clientY

  canvas.addEventListener('mousemove', onMouseMove)
})

canvas.addEventListener('mouseup', (e) => {
  canvas.removeEventListener('mousemove', onMouseMove)
})
Currently, this code won't do anything useful, as we're not actually updating our transformations. However, if you open your console, you will see that as you click and drag around the canvas our mouse events get logged.
Take a moment to explore the mouse event that's being logged. We're going to be using a few parameters from this event.
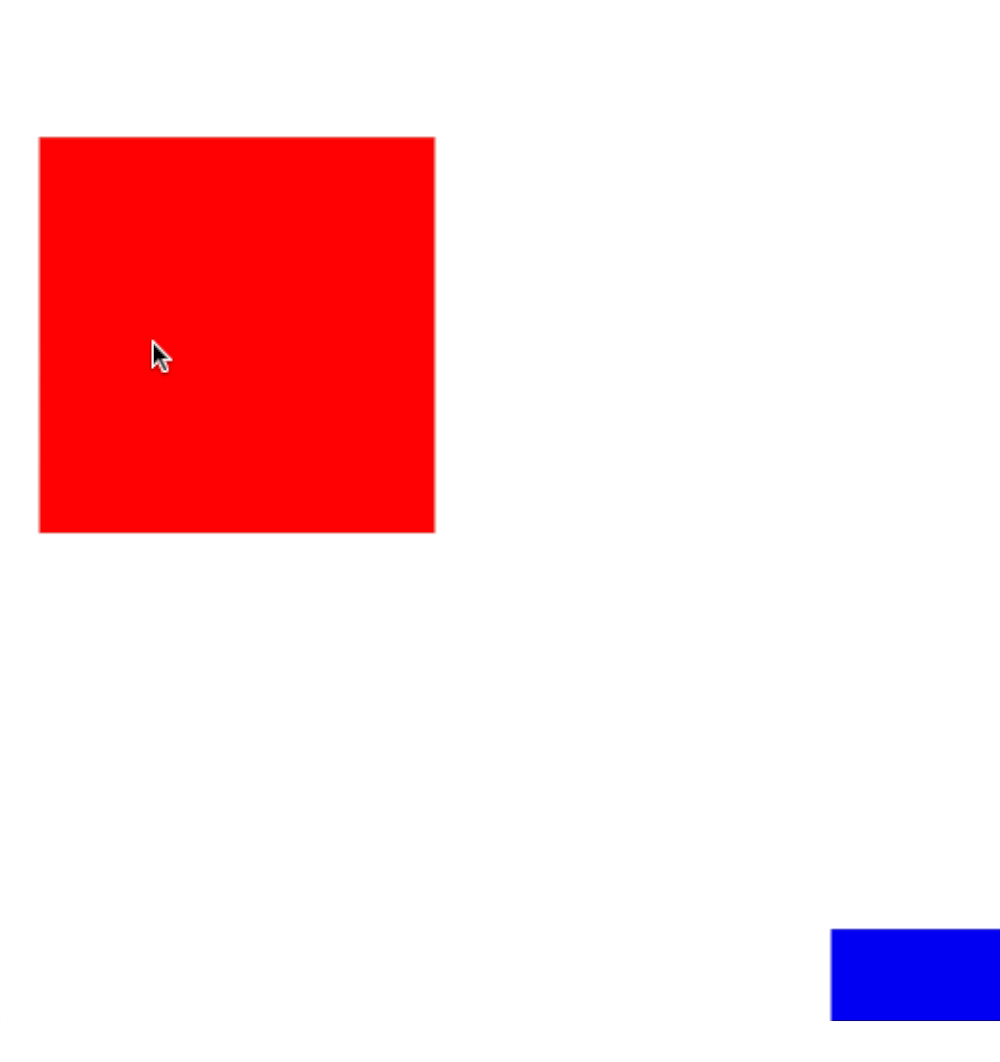
Let's go back to our render function, and modify it to the following code.
const render = () => {
  // New code 👇
  ctx.setTransform(1, 0, 0, 1, 0, 0)
  ctx.clearRect(0, 0, canvas.width, canvas.height)
  ctx.setTransform(
    viewportTransform.scale,
    0,
    0,
    viewportTransform.scale,
    viewportTransform.x,
    viewportTransform.y
  )
  // New Code 👆

  drawRect(0, 0, 100, 100, 'red')
  drawRect(200, 200, 100, 100, 'blue')
}
Pull up your browser, and take a look. We have panning!
You might be wondering why we need to call
setTransformtwice. If we don't reset the transform before clearing the canvas, then we'll end up with a bunch of artifacts during our scaling events.
Zooming
Now that we have panning, let's add zooming. Zooming is a bit more complicated than panning, but it's still pretty straightforward. We'll be using the mouse wheel to zoom in and out.
Go ahead and add the folling function underneath your updatePanning function.
const updateZooming = (e) => {
  const oldScale = viewportTransform.scale
  const oldX = viewportTransform.x
  const oldY = viewportTransform.y

  const localX = e.clientX
  const localY = e.clientY

  const previousScale = viewportTransform.scale

  const newScale = (viewportTransform.scale += e.deltaY * -0.01)

  const newX = localX - (localX - oldX) * (newScale / previousScale)
  const newY = localY - (localY - oldY) * (newScale / previousScale)

  viewportTransform.x = newX
  viewportTransform.y = newY
  viewportTransform.scale = newScale
}
We also need an event listener for this. We'll add these closer to the bottom of the script.
const onMouseWheel = (e) => {
  updateZooming(e)

  render()

  console.log(e)
}

canvas.addEventListener('wheel', onMouseWheel)
Now, if you open your browser, you should be able to zoom in and out of your scene using the mouse wheel!
Wrapping Up
We've now covered the basics of panning and zooming in a canvas element. We've also covered how to use the mouse wheel to zoom in and out. Stay tuned to read more about my adventures in canvas!
Finished Code
If you'd like to see the finished code, you can find it as an all-in-one Gist here.
Thanks for reading!