In this installment of my HTML canvas series, I'm going to be demonstrating how free-drawing in HTML canvas works, and how you can implement it in your own projects.
We'll be using native HTML and JavaScript, and working without any external libraries, so you can be sure that you'll be able to use this in any project you're working on. However, stay tuned for future content as I'll be exploring how to integrate these concepts into React applications as well.
What is free-drawing?
Before we dive into coding the feature, let's quickly recap on what free-drawing is. Free-drawing is the ability to use your mouse, finger, or other input device to draw on a canvas. This is a staple feature in any kind of drawing, art, or note taking apps, and is a great way to add interactivity to your web applications.
This poses a number of unique challenges, and gives rise to a number of interesting approaches we can take. For example, we can simply draw pixels to the canvas wherever the mouse is moved. Alternatively we can draw lines between the previous and current mouse position. We can also use a combination of both of these approaches, and even add in some smoothing to make the lines look more natural.
Both of these solutions have pros and cons. The first approach is simple, but can result in a very jagged line. The second approach is more complex, but results in a smoother line. We'll be exploring both of these approaches, and how we can combine them to create a free-drawing tool that is both simple and powerful.
Drawing pixels
The first approach we'll be exploring is drawing pixels to the canvas. This is the simplest approach, and is a great place to start if you're new to HTML canvas. It's also a great place to start if you're looking to create a simple free-drawing tool that doesn't require any additional processing.
To get started, we'll be using a simple HTML template I've created, which you can use to follow along with me.
<html>
  <body>
    <canvas width="500" height="500" id="canvas"></canvas>

    <script>
      const canvas = document.getElementById('canvas')
      const ctx = canvas.getContext('2d')

      let penColor = 'red'
      let penWidth = 5

      // Your code here 👇

      // End of your code 👆

      const render = (e) => {
        const x = e.offsetX
        const y = e.offsetY

        console.log(`Drawing at (${x}, ${y})`)
      }

      canvas.addEventListener('mousedown', () => {
        canvas.addEventListener('mousemove', render)

        canvas.addEventListener('mouseup', () => {
          canvas.removeEventListener('mousemove', render)
        })
      })
    </script>
  </body>
</html>
Go ahead and open up the HTML file in your browser, and open up the console. You should see the message "Drawing at (x, y)" being logged to the console whenever you move your mouse over the canvas while holding the mouse button. This is because we're adding a mousemove event listener to the canvas whenever the mousedown event is fired, and removing it when the mouseup event is fired.
With that out of the way, let's implement our simple pixel rendering function. Make sure you add all new code between the comments I've provided.
const drawPixels = (x, y) => {
  ctx.beginPath()

  ctx.arc(x, y, penWidth, 2 * Math.PI, false)
  ctx.fillStyle = penColor

  ctx.fill()
}
And call it in the render function.
const render = (e) => {
  // ...

  drawPixels(x, y)
}
Now, if you refresh the page, you should see a red circle being drawn wherever your mouse is moved and your mouse is held down. We're using the arc method of the Canvas, and telling it to draw a circle (2 * PI might look familiar to you!) with a radius of 5 pixels. We're also filling the circle with the color red.
Let's see what that looks like.
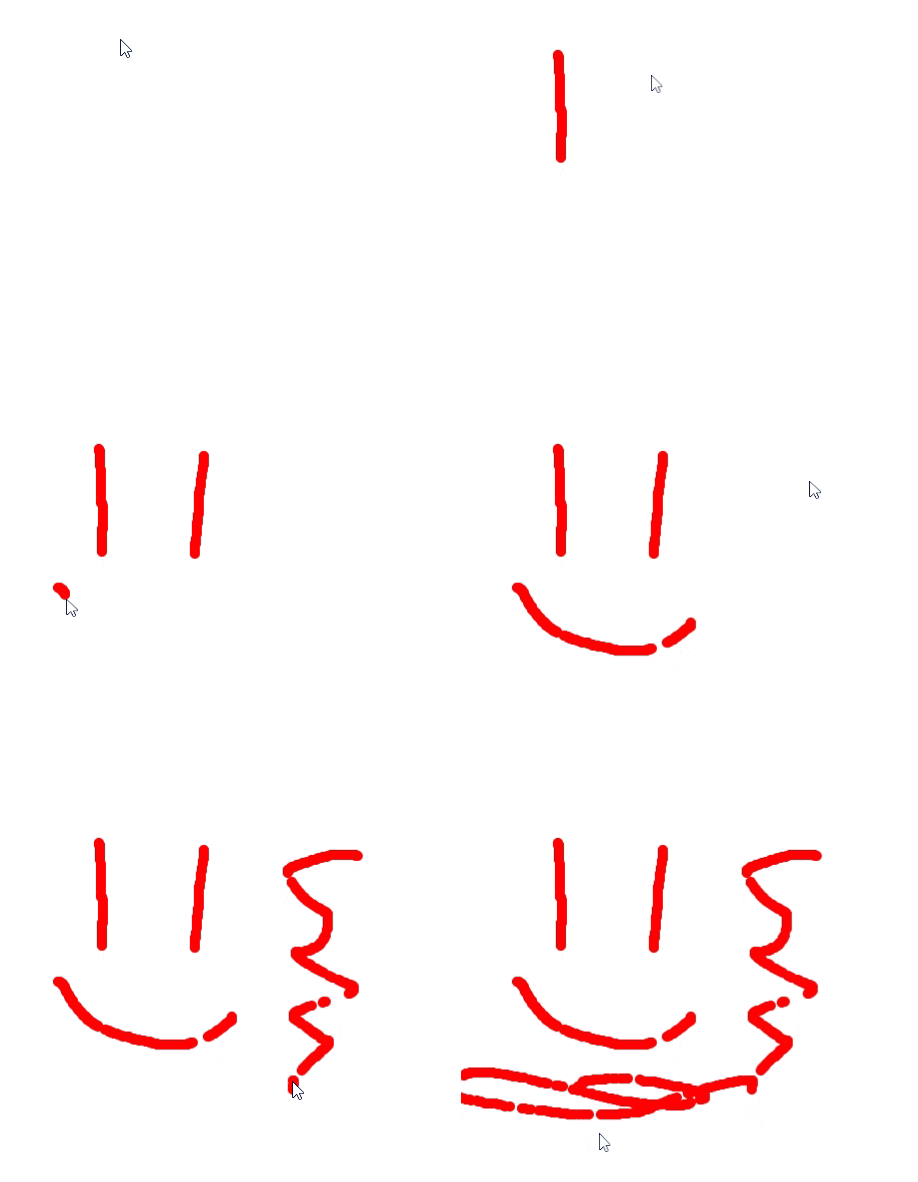
One issue should be immediately noticeable: if we move our mouse quickly, we end up with gaps in our pen tool. This is because the browser only calls our mousemove events so quickly, and we're not drawing anything in between. We will attempt to fix this later on in this exploration, but for now let's add a little more functionality.
Erasing
Before we get too lost in the weeds drawing pixels, let's also quickly add a way to remove pixels. There are a couple different ways we can tackle this, but we'll use the contexts globalCompositeOperation property to achieve this.
const erasePixels = (x, y) => {
  ctx.save()

  ctx.beginPath()
  ctx.arc(x, y, penWidth, 2 * Math.PI, false)

  ctx.globalCompositeOperation = 'destination-out'

  ctx.fillStyle = 'white'
  ctx.fill()
  ctx.restore()
}
In order to use this function, let's quickly modify our render function to check if the user is holding down the shift key. If they are, we'll call erasePixels instead of drawPixels.
const render = (e) => {
  const x = e.offsetX
  const y = e.offsetY

  console.log(`Drawing at (${x}, ${y})`)

  if (e.shiftKey) {
    erasePixels(x, y)
  } else {
    drawPixels(x, y)
  }
}
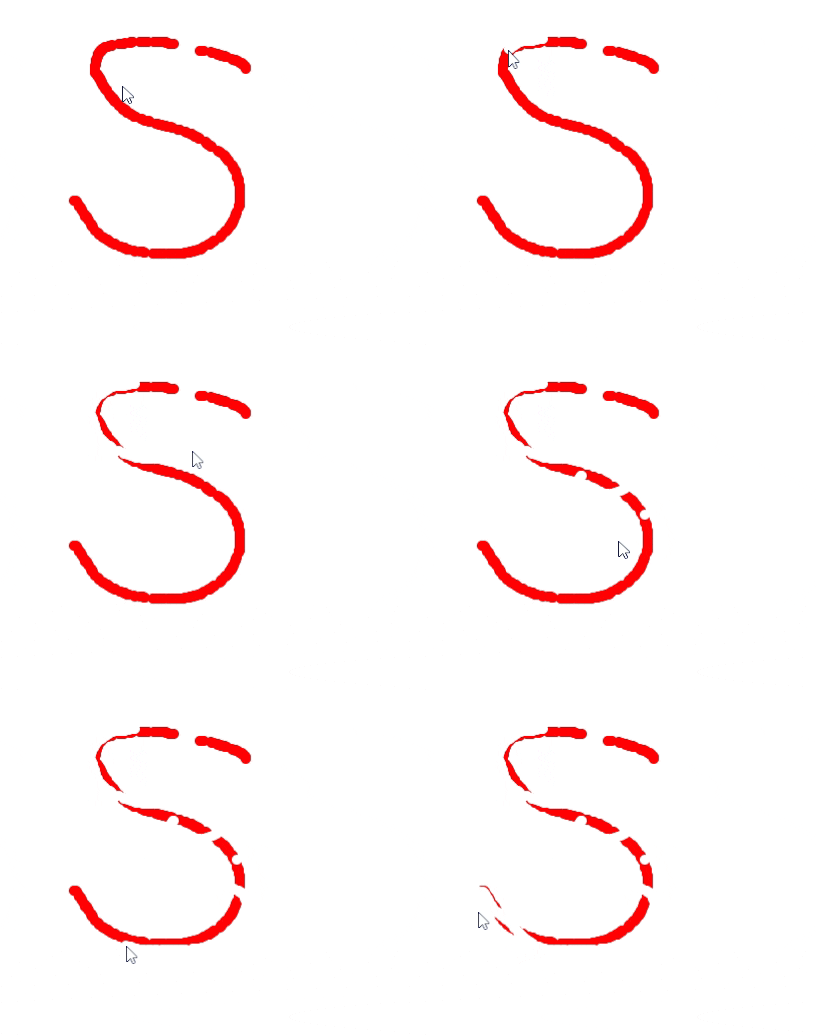
Now, if you refresh the page, you should be able to erase pixels by holding down the shift key while drawing. Here's what that looks like.
Adding some color
Now that we have a basic pen tool, let's go ahead and add some color. We're going to do this as simply as possible but adding a couple different buttons to the page, and changing the penColor variable when the user clicks on them.
Go ahead and add the following just below your <canvas> element.
<button id="blue-button">Blue</button> <button id="red-button">Red</button>We'll also need to add some event listeners to our JavaScript code.
const blueButton = document.getElementById('blue-button')
blueButton.addEventListener('click', () => {
  penColor = 'blue'
})

const redButton = document.getElementById('red-button')
redButton.addEventListener('click', () => {
  penColor = 'red'
})
Now, if you refresh the page, you should be able to change the color of your pen by clicking on the buttons. Here's what that looks like.
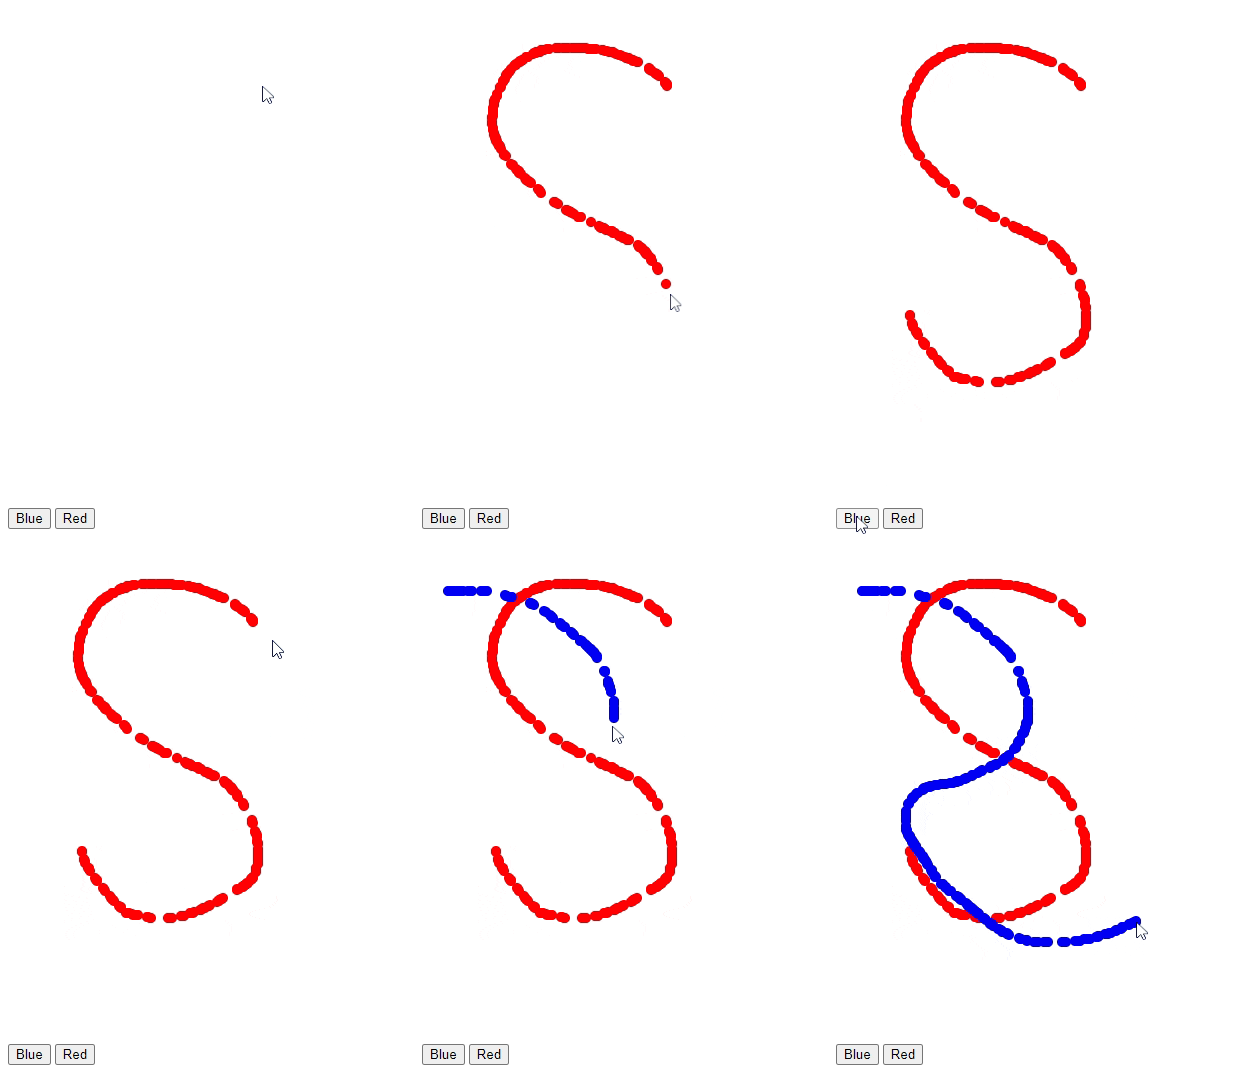
Our canvas free-drawing tool is really coming along! At this point, we have a simple pen tool that can draw and erase pixels, and change colors. We can also draw lines by moving our mouse quickly. However, the issue we mentioned earlier still remains: if we move our mouse quickly, we end up with gaps in our pen tool. We'll be exploring a couple different ways to fix this in the next section.
Drawing with lines
In order to fix the issue we mentioned earlier, we're going to be using the CanvasRenderingContext2D's lineTo method. This method allows us to draw a line from one point to another. We'll be using this method to draw a line from the previous point to the current point, and then fill the line with a circle.
To do this, we're going to need to keep track of where the mouse has been. We'll do this by adding a couple of extra variables to the top of our custom code block.
let previousX = 0
let previousY = 0
Now we're going to set these values when the user clicks down on the canvas. Note that we're modifying our event listeners in this next section, so make sure you update the existing event listeners with this new block.
canvas.addEventListener('mousedown', (e) => {
  previousX = e.offsetX
  previousY = e.offsetY

  canvas.addEventListener('mousemove', render)

  canvas.addEventListener('mouseup', () => {
    canvas.removeEventListener('mousemove', render)
  })
})
Next we need the functions we'll be using to draw and erase our lines.
const drawLine = (x, y) => {
  ctx.beginPath()
  ctx.moveTo(previousX, previousY)
  ctx.lineTo(x, y)

  ctx.strokeStyle = penColor
  ctx.lineWidth = penWidth
  ctx.lineCap = 'round'

  ctx.stroke()
}

const eraseLine = (x, y) => {
  ctx.save()

  ctx.beginPath()
  ctx.moveTo(previousX, previousY)
  ctx.lineTo(x, y)

  ctx.globalCompositeOperation = 'destination-out'

  ctx.strokeStyle = 'white'
  ctx.lineWidth = penWidth
  ctx.lineCap = 'round'

  ctx.stroke()
  ctx.restore()
}
And last but not least, we'll modify our render function to use these two new functions, and also update our previousX and previousY variables.
const render = (e) => {
  const x = e.offsetX
  const y = e.offsetY

  console.log(`Drawing at (${x}, ${y})`)

  if (e.shiftKey) {
    // erasePixels(x, y)
    eraseLine(x, y)
  } else {
    // drawPixels(x, y)
    drawLine(x, y)
  }

  previousX = x
  previousY = y
}
Now, if you refresh the page, you should be able to draw lines without any gaps. Here's what that looks like.
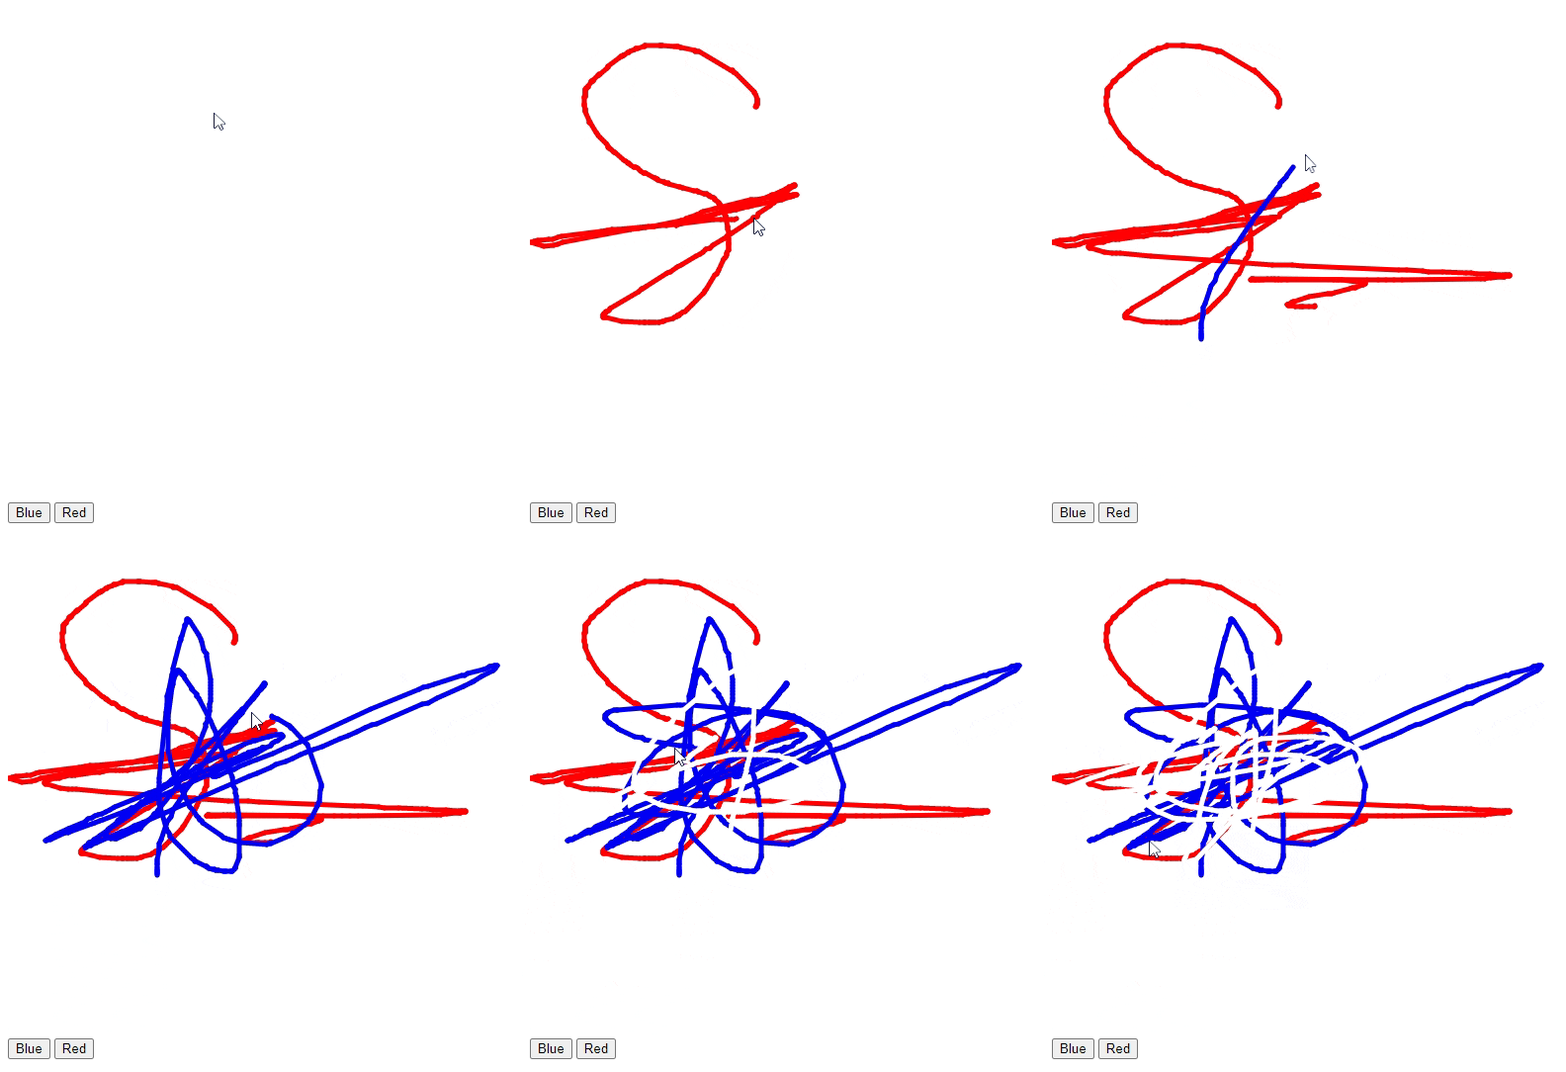
Notice that no matter how quickly we move our mouse, our lines have no gaps between them. Our pen drawing tool is finally feeling like a real pen!
Bonus round
If you've made it this far, congratulations! You've successfully built a pen drawing tool using the Canvas API. If you're feeling adventurous, here are a couple of bonus features you can add to your pen drawing tool.
Adjusting the pen width
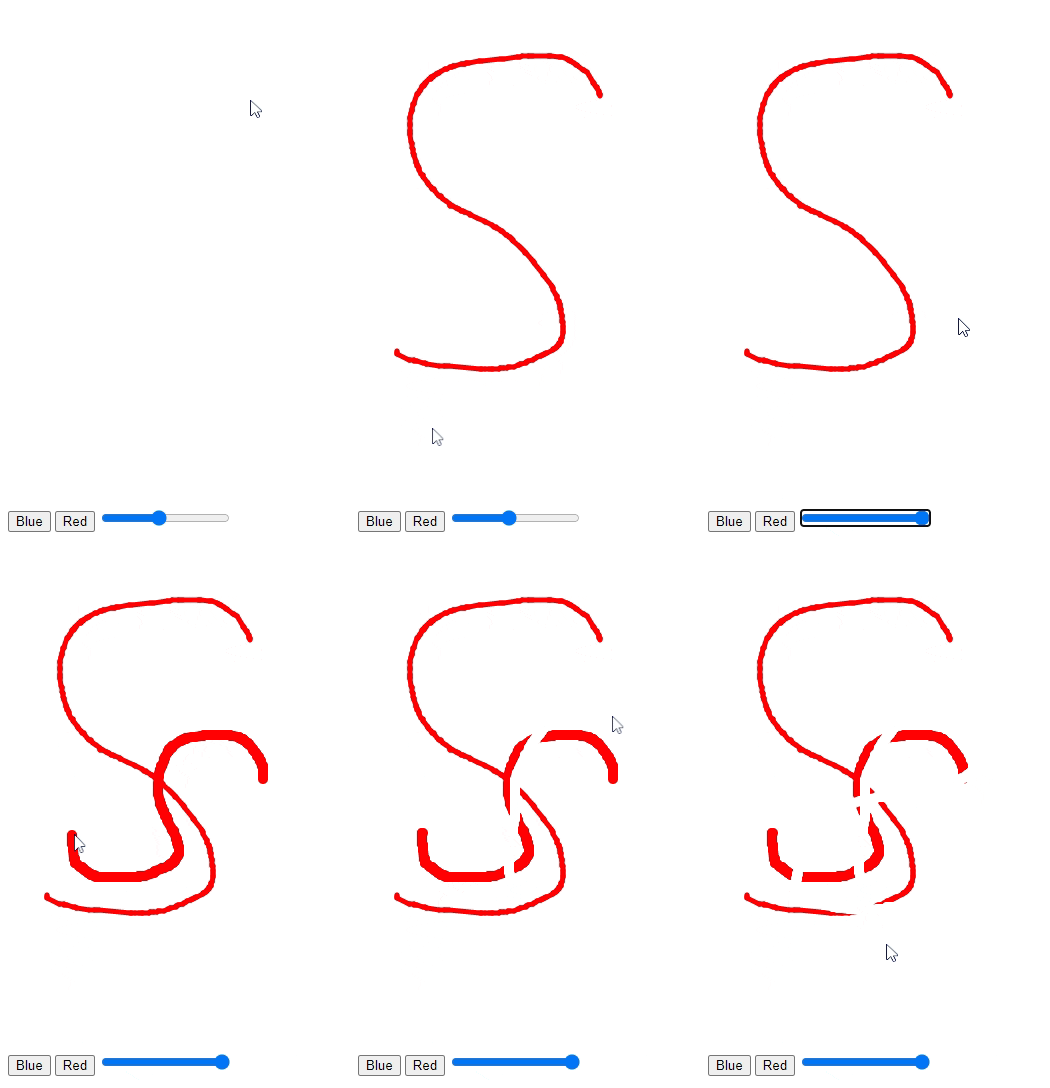
We've already added a way to change the color of our pen, but we haven't added a way to change the width of our pen. Let's go ahead and add that now. We'll go ahead and add a slider to our page, and then add an event listener to our JavaScript code.
<input type="range" id="pen-width" min="1" max="10" value="5" />const penWidthInput = document.getElementById('pen-width')
penWidthInput.addEventListener('input', (e) => {
penWidth = parseInt(e.target.value)
})Let's see it in action!
Adding a width indicator
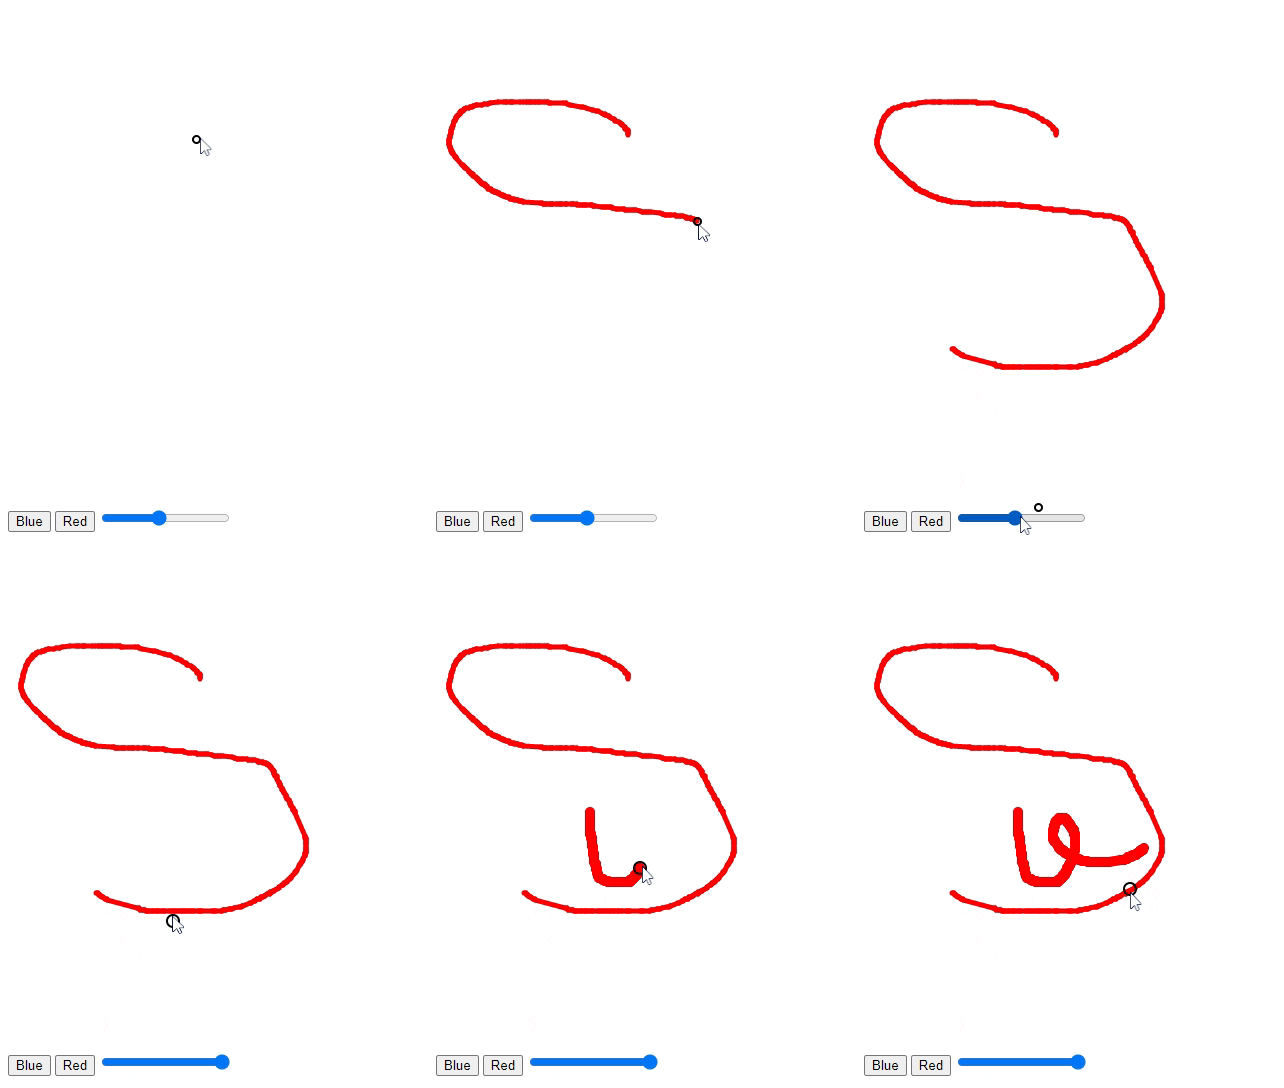
The last quick bonus feature we'll add is a width indicator. This will allow us to see the width of our pen without having to adjust the slider. We'll go ahead and add a <div> element to our page, and then add some CSS to style it.
Note that we're changing up our HTML structure a bit here. We'll need to wrap all our HTML elements we've created in a <div>, so I've posted what that looks like below.
<div class="relative">
  <canvas width="500" height="500" id="canvas"></canvas>

  <button id="blue-button">Blue</button>
  <button id="red-button">Red</button>

  <input type="range" id="pen-width" min="1" max="10" value="5" />

  <div
    id="width-indicator"
    style="position: absolute; border: 2px solid black; border-radius: 50%; width: 5px; height: 5px; pointer-events: none"
  ></div>
</div>
We're also going to need get a reference to our width indicator element, and then update our width indicator whenever the user changes the pen width.
const widthIndicator = document.getElementById('width-indicator')

const penWidthInput = document.getElementById('pen-width')
penWidthInput.addEventListener('input', (e) => {
  penWidth = parseInt(e.target.value)

  // New code in this function 👇
  widthIndicator.style.width = `${penWidth}px`
  widthIndicator.style.height = `${penWidth}px`
})
And lastly, we're going to add a new mouse event listener. Note that we're not modifying our existing listener.
canvas.addEventListener('mousemove', (e) => {
  const x = e.pageX
  const y = e.pageY

  widthIndicator.style.left = `${x - penWidth / 2 - 2}px`
  widthIndicator.style.top = `${y - penWidth / 2 - 2}px`
})
Great, let's take a look at the result now!
Conclusion
In this article, we've explored a couple different methods for free-drawing in HTML canvas, completely from scratch. We've seen the pros and cons of each method, and we've also seen how to build a pen drawing tool using the Canvas API.
If you'd like to see the final code for this article, you can find it on GitHub.
Thanks for reading, make sure to subscribe to my newsletter to get notified when I publish new articles.